Haldex Controller Transporter T5 Gen2 Plug and Play Installation Guide
VE PRODUCT SUPPORT / INSTALLATION
Transporter T5 Gen2 Plug and Play Installation
Install the VE Haldex Controller with the Transporter-specific Plug and Play loom at connector T8ag in the left rear D-pillar. The photos show a long-wheelbase van with passenger trim. The trim fasteners and access can vary with the interior.
Confirm the Haldex generation and use the matching Transporter Plug and Play kit. Locate T8ag in the Volkswagen wiring diagram for your vehicle. Switch off the ignition before unplugging any connectors.
If the seat belt bracket blocks access, follow the Volkswagen repair instructions for removing and refitting it. Keep the seat belt and its mounting hardware in their original positions.
TRANSPORTER / T8ag INLINE LOOM
Installation
STEP 01
Remove the left rear side trim
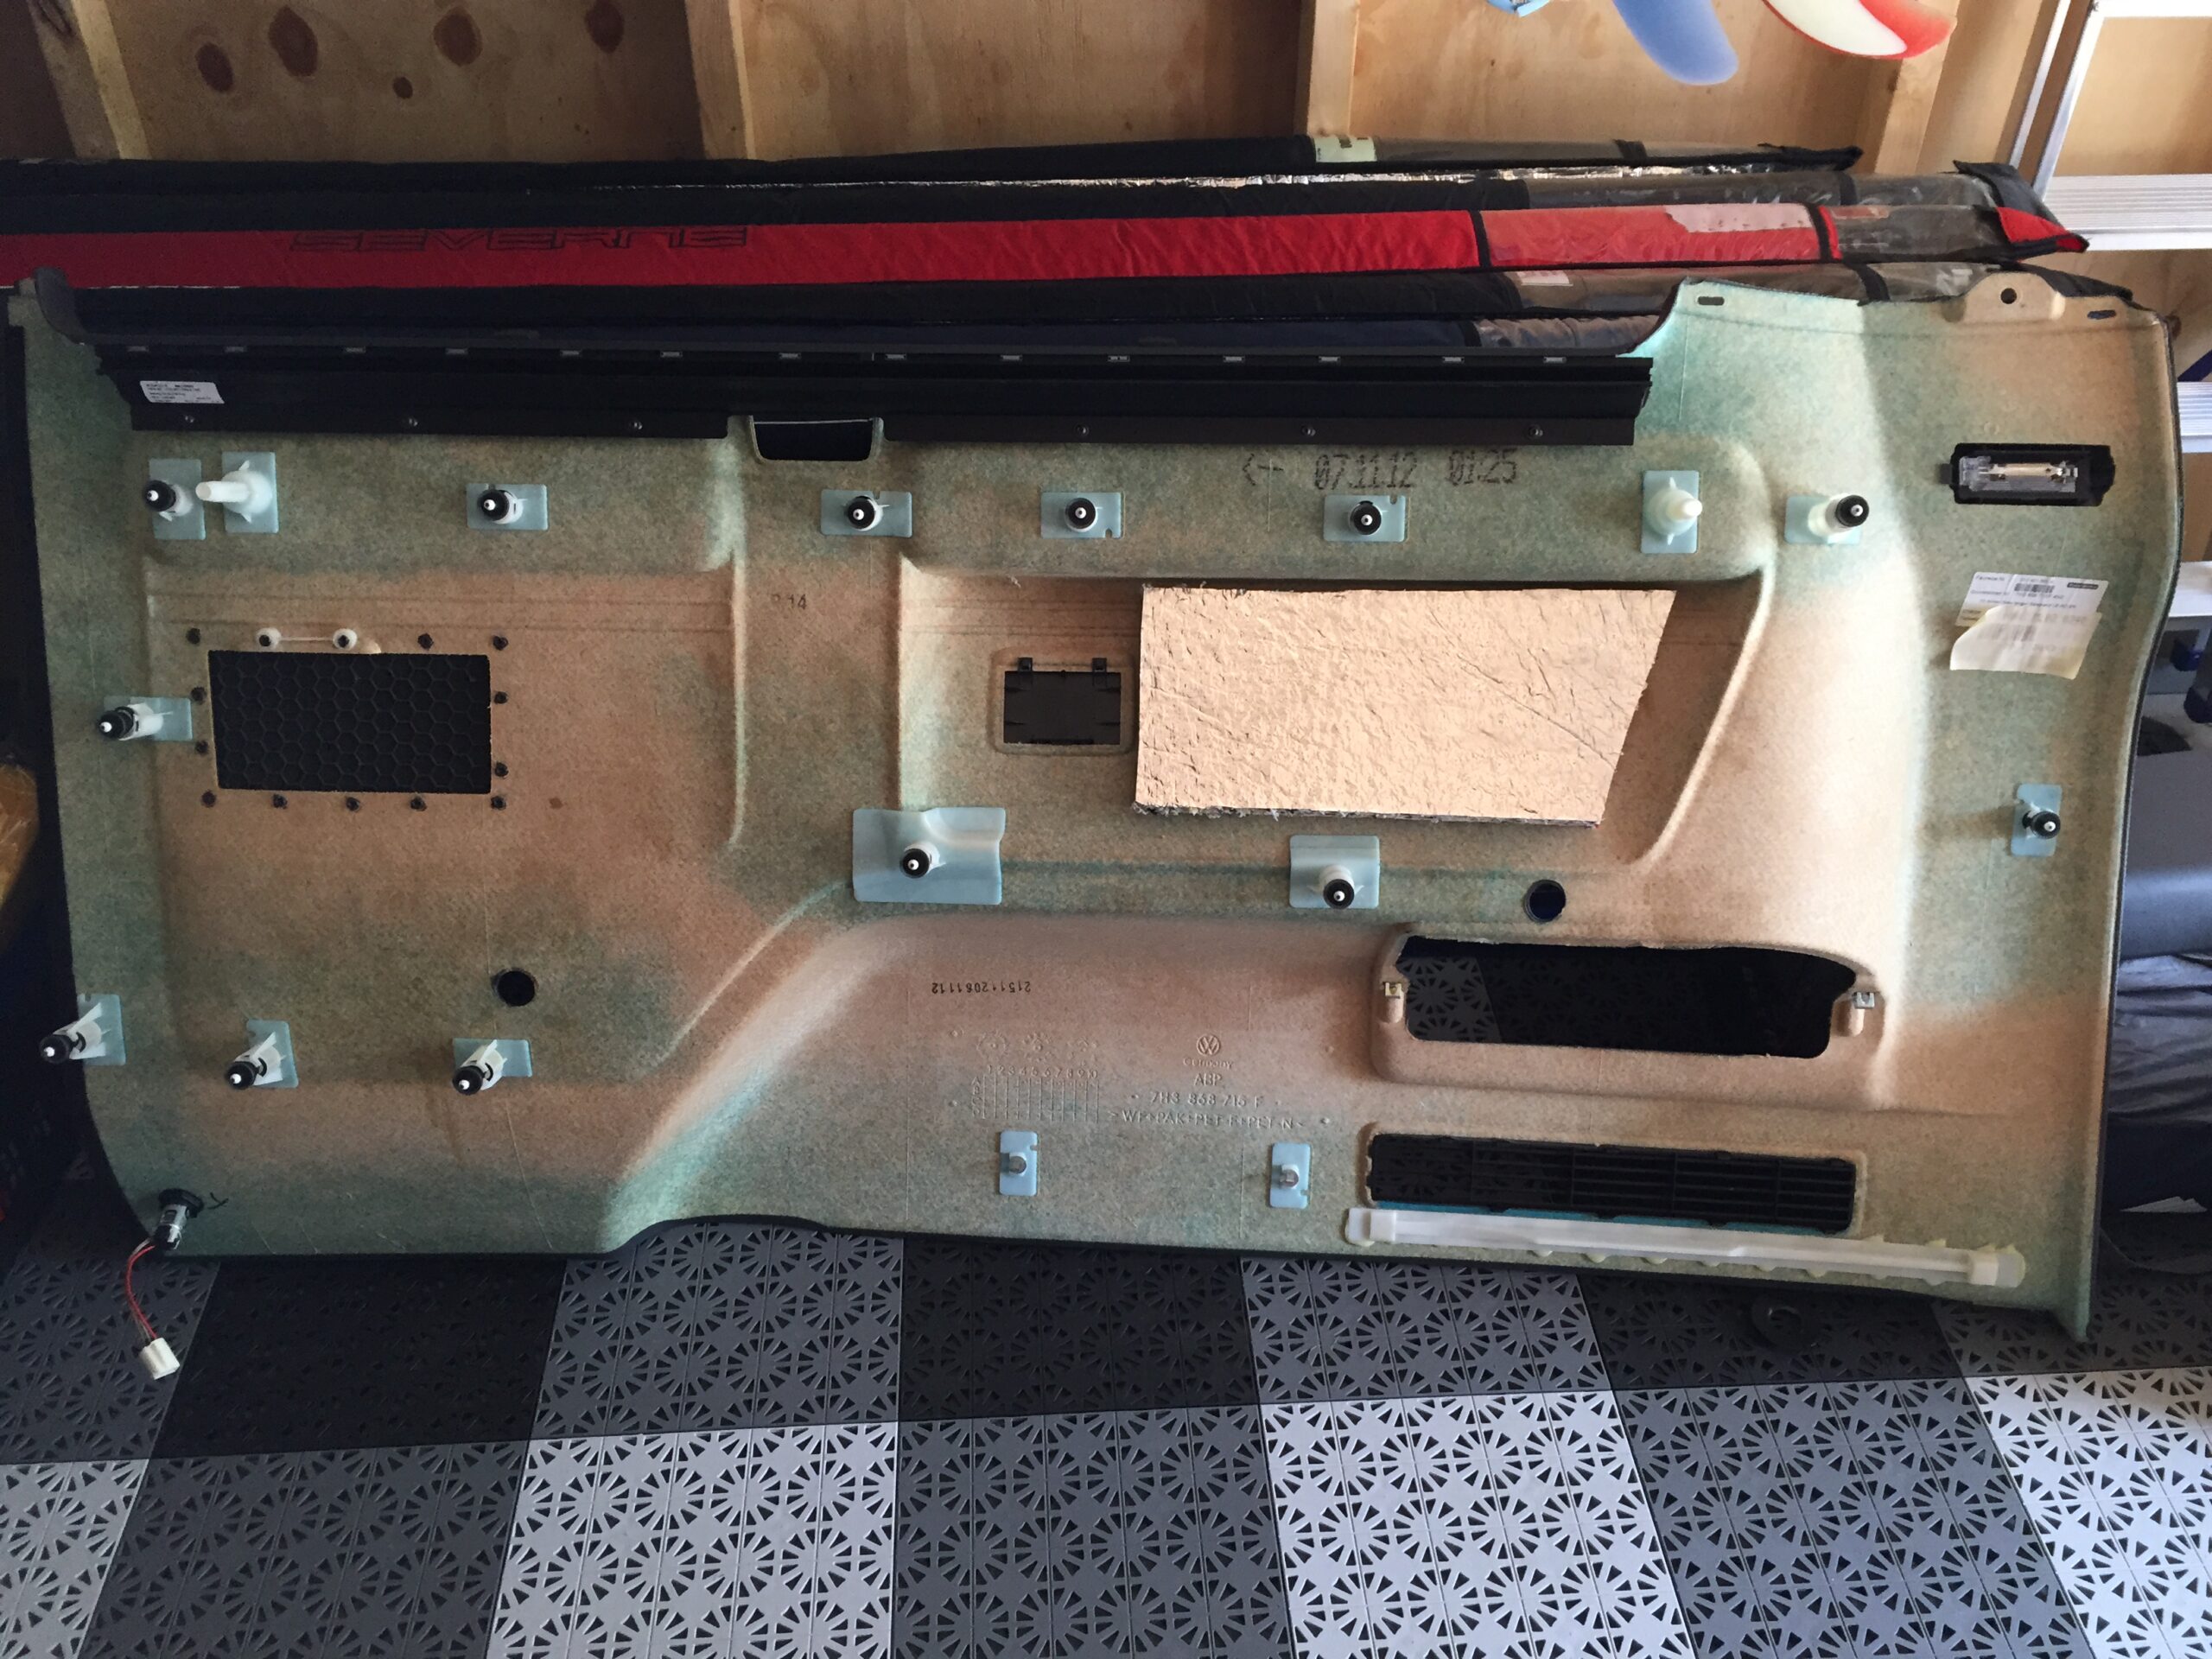
Release the rear side panel on the left to expose the D-pillar wiring. On Multivan and Caravelle interiors, use the clip locations in the photos as a reference. Release the panel close to each clip so the plastic holders do not flex or break.
Marked clip locations on the front of the left rear side panel
Clip locations on the back of the left rear side panel
STEP 02
Find T8ag and connect the inline loom
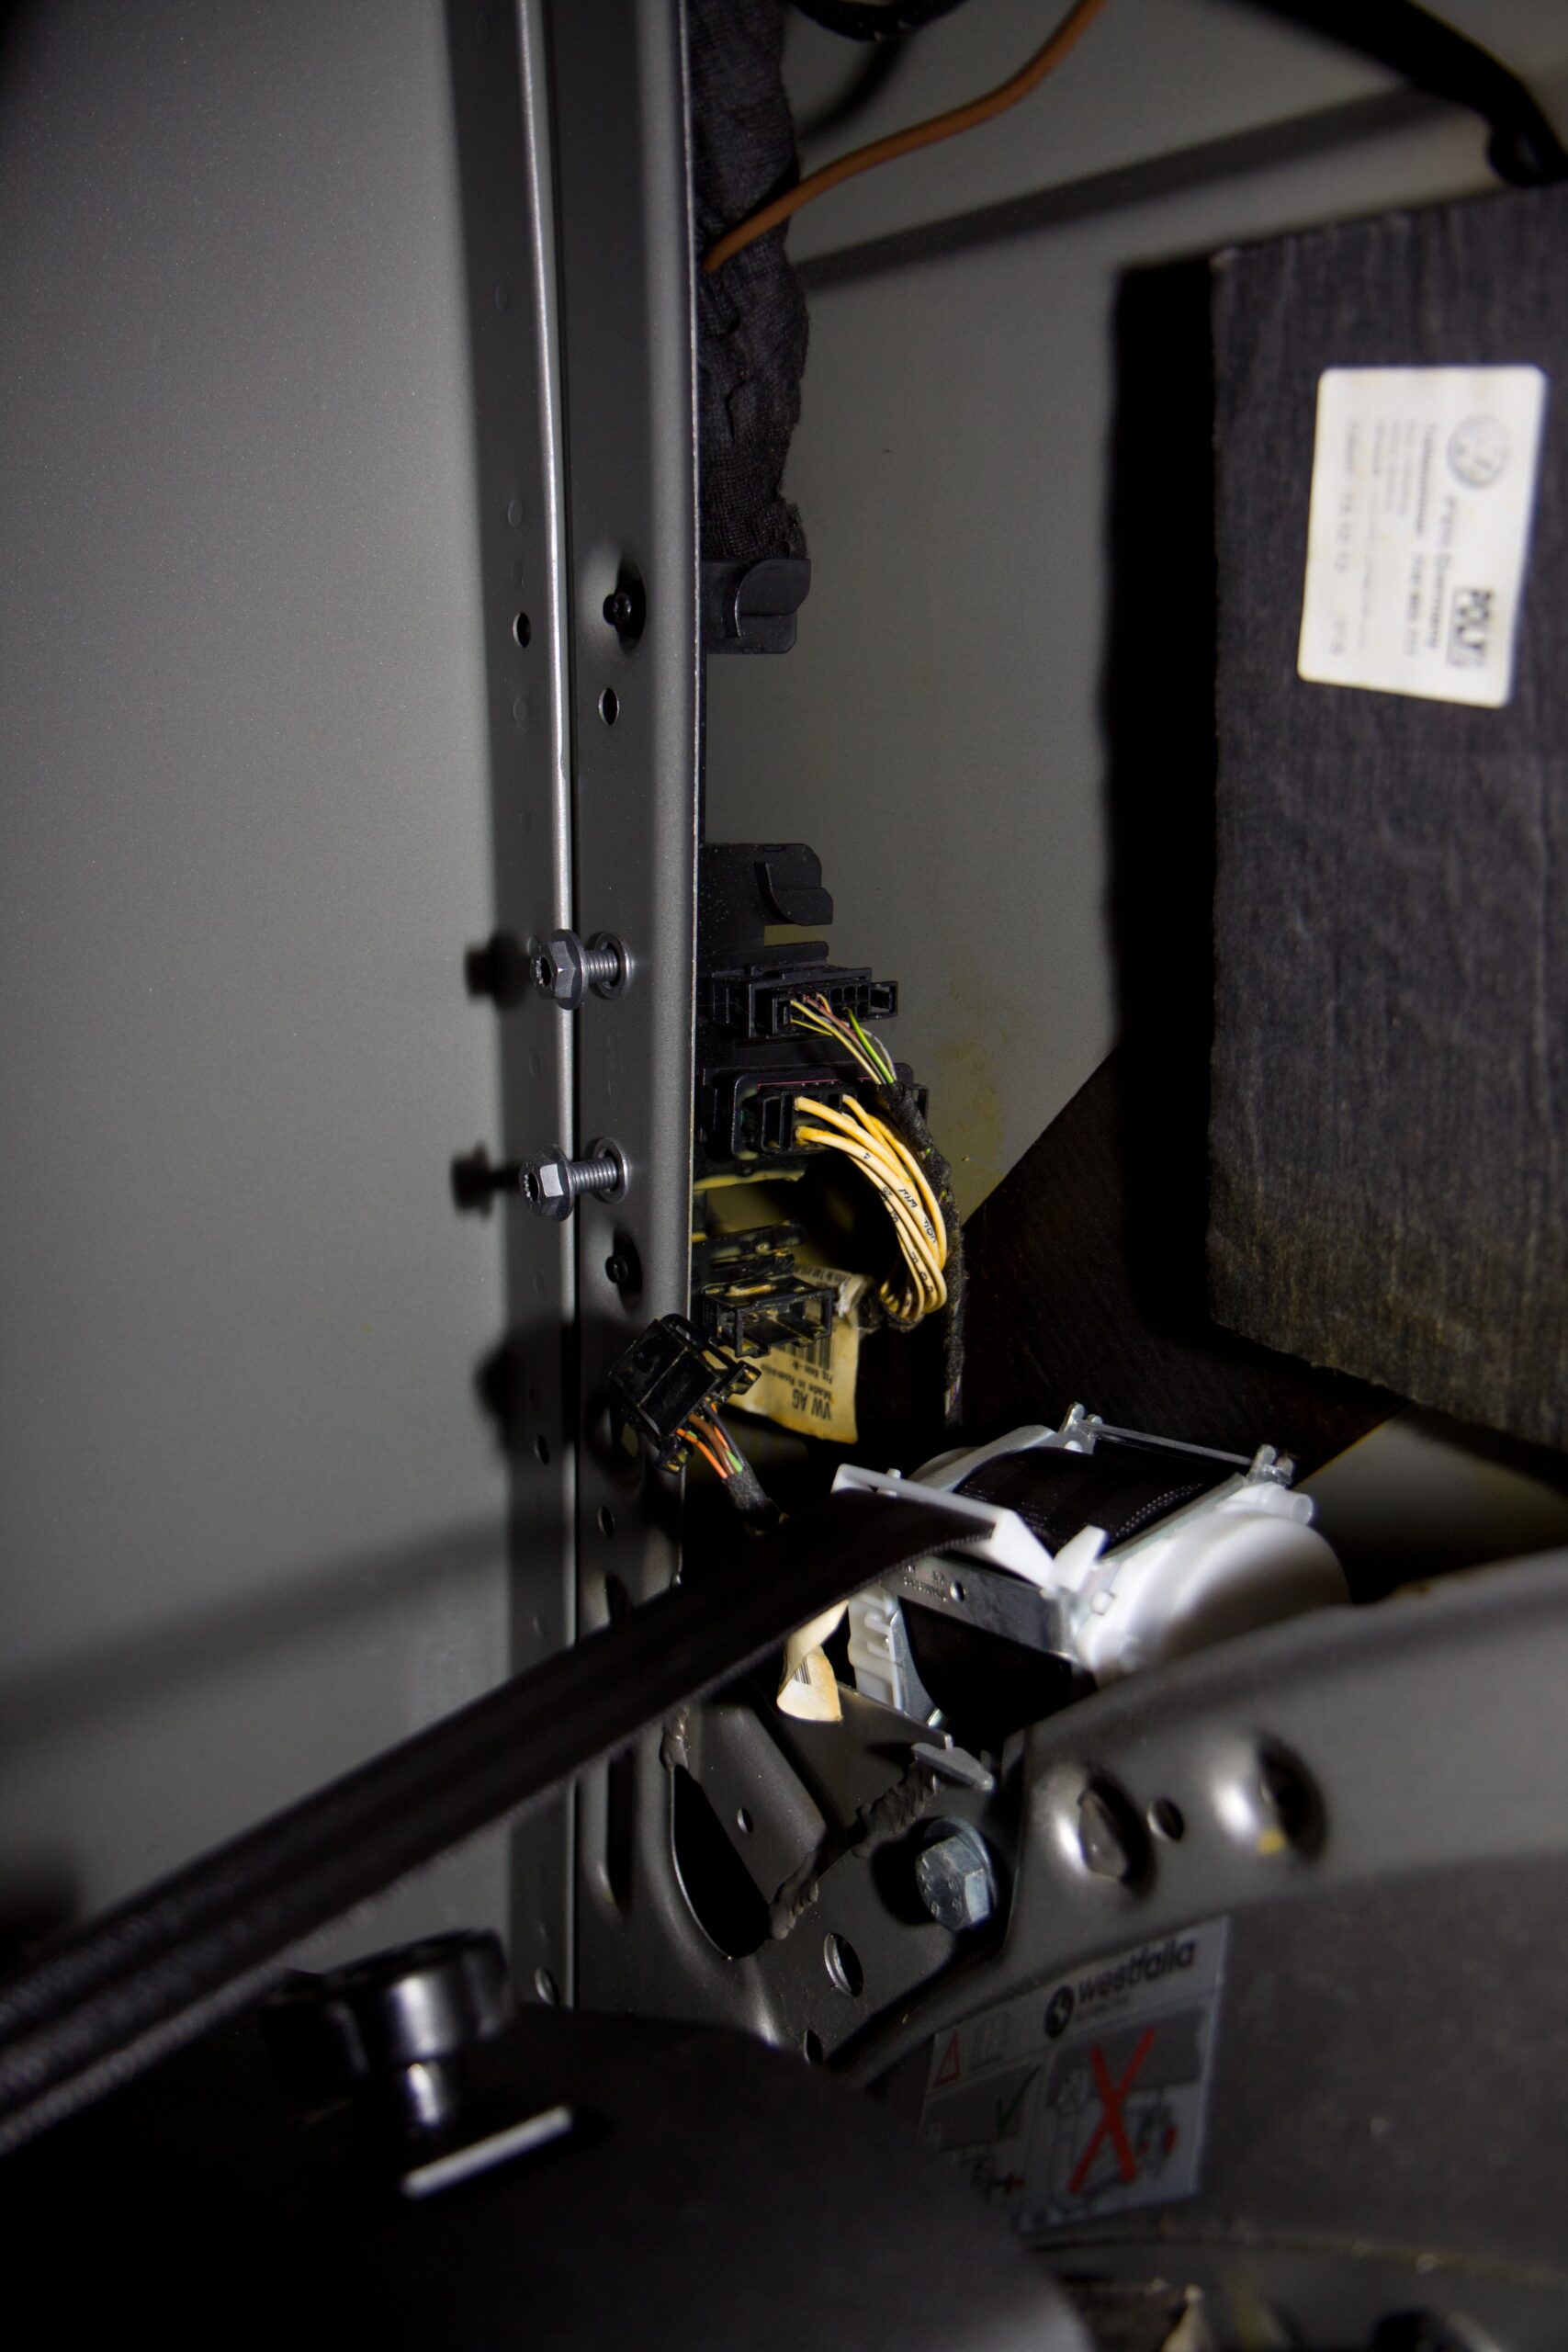
Look behind the seat belt for T8ag at the bottom of the connector holder. The fixed half with pins carries power and CAN from the vehicle harness. The removable socket leads to the Haldex unit.
Separate T8ag and plug each end of the VE loom into its matching half. Check both latches. On the van shown, the Haldex-side connection fits into the spare position above T8ag. The vehicle-side connection stays at the bottom.
Connector holder exposed behind the left rear seat belt
Close-up of the lower T8ag connection in the left D-pillar
Wiring access around the left D-pillar and seat belt bracket
STEP 03
Mount the controller and refit the trim
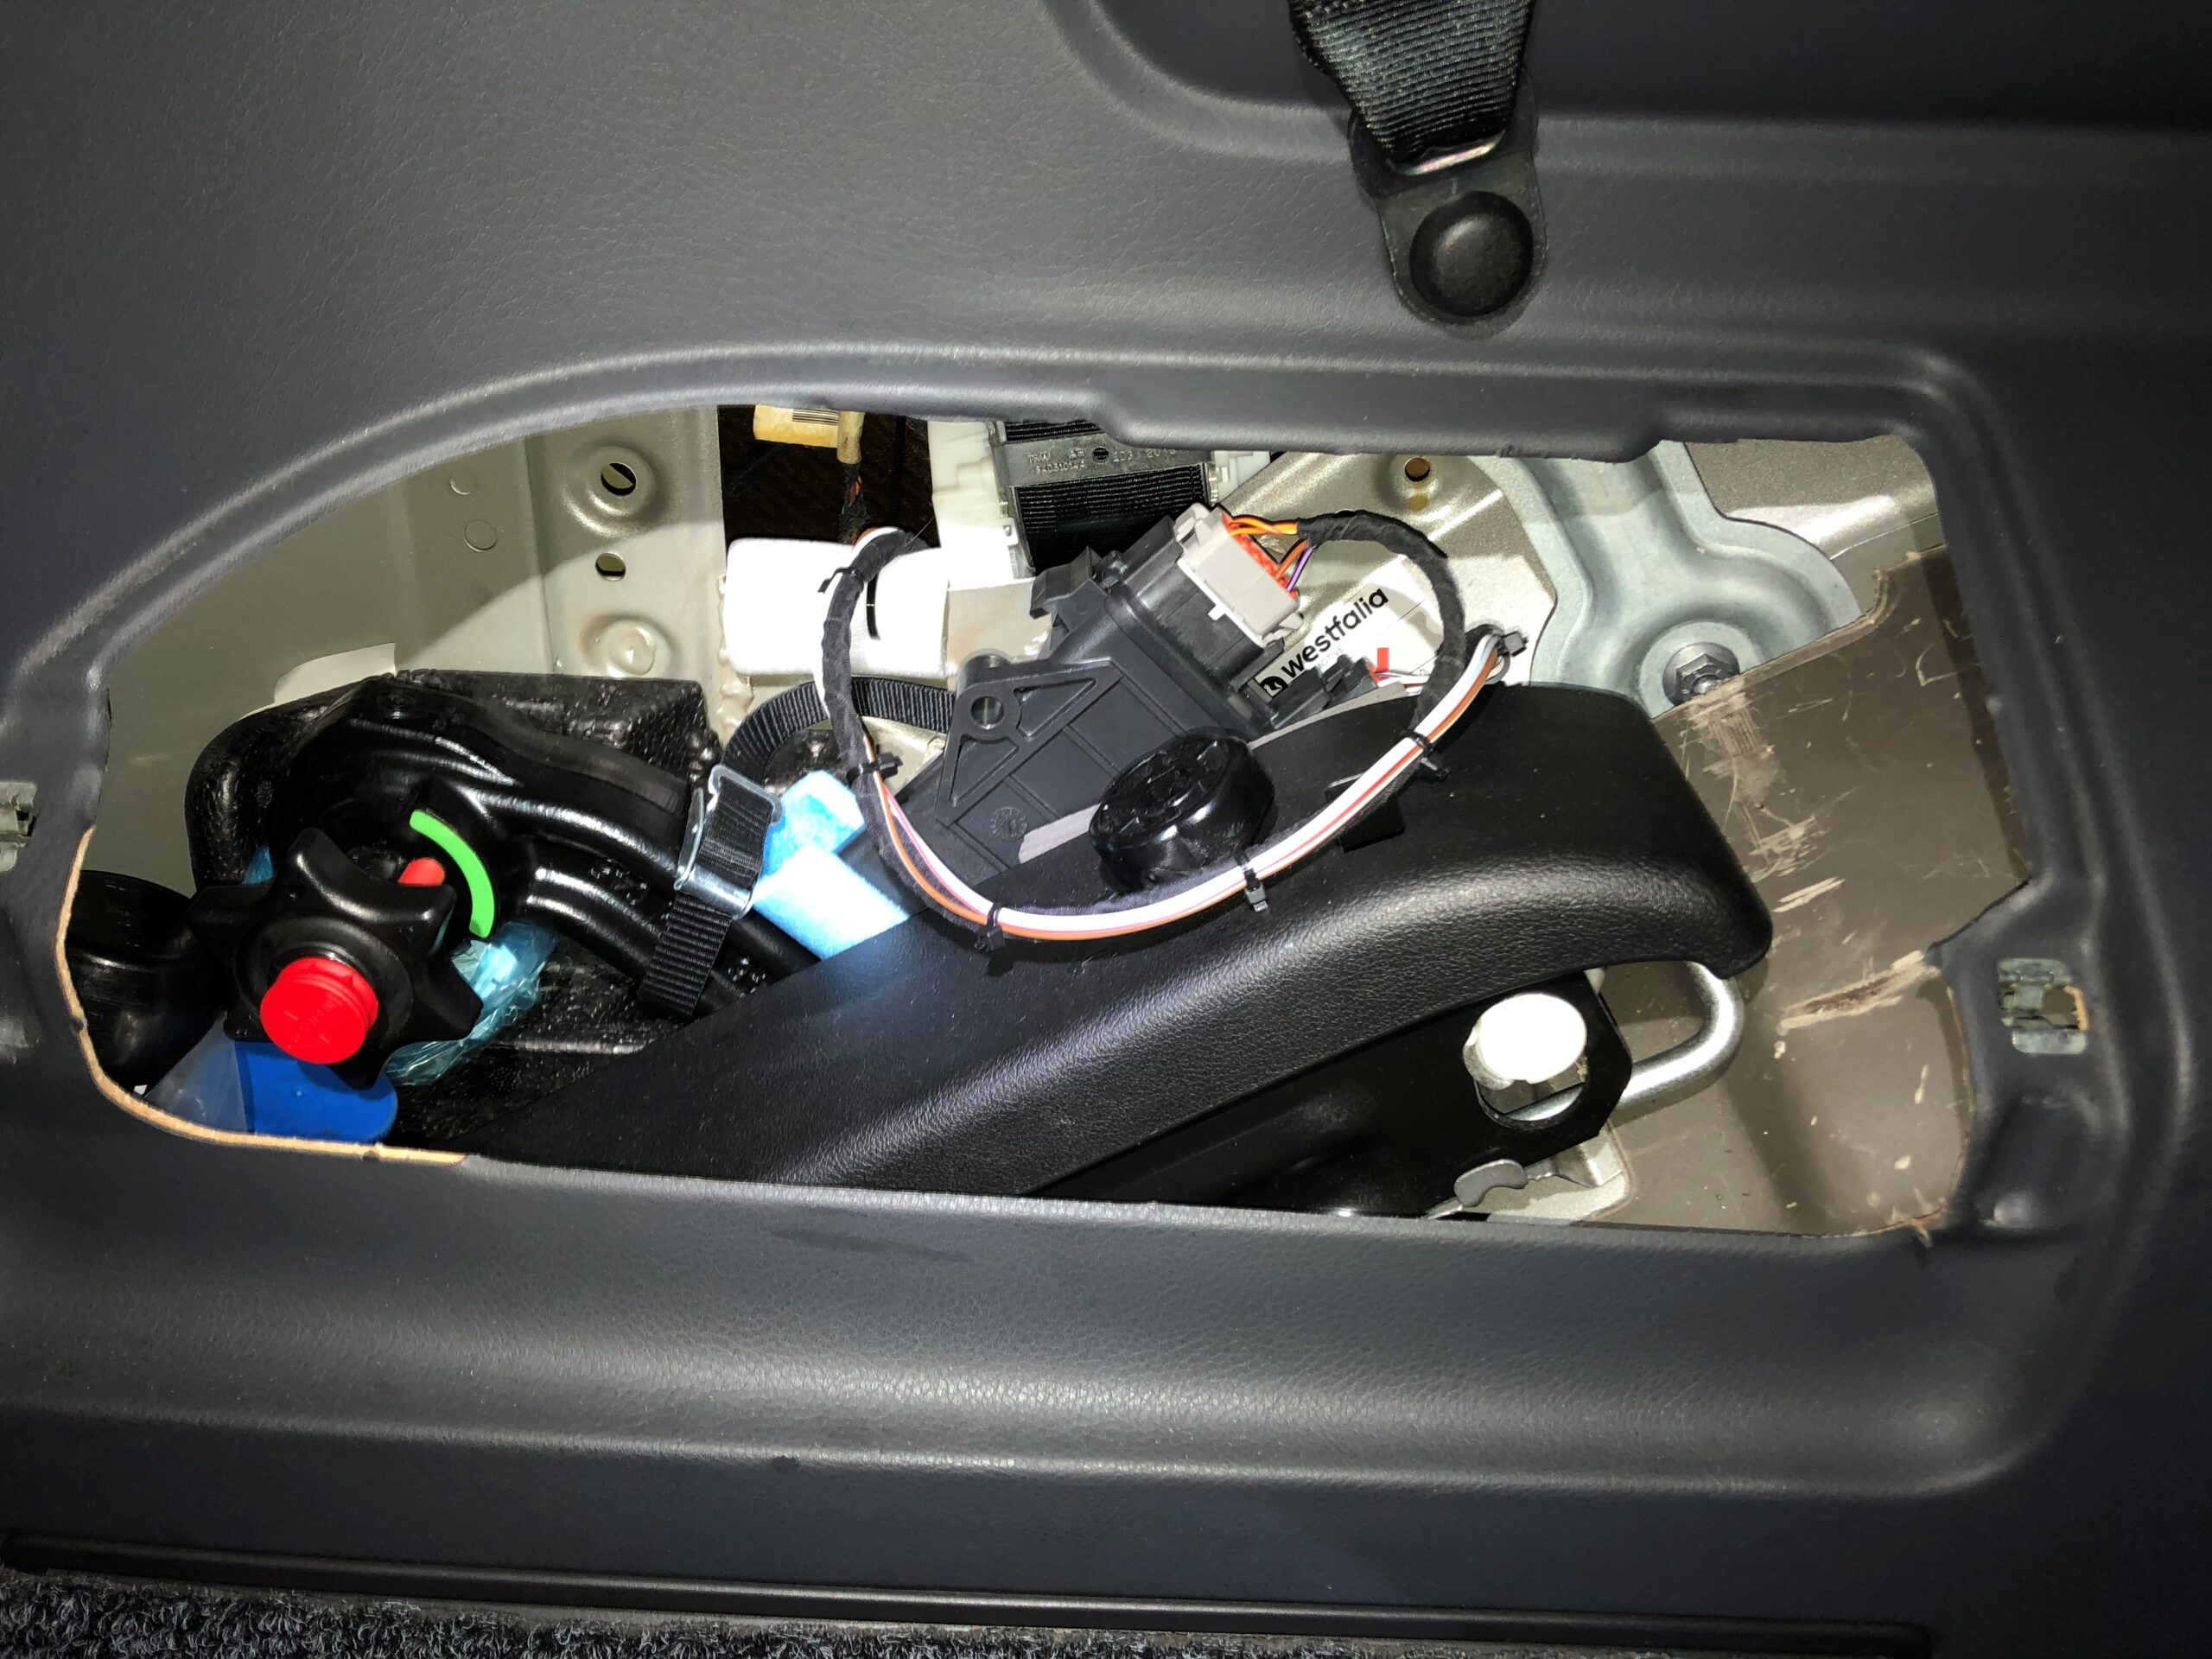
Connect and secure the controller in a suitable spot in the jack compartment. Keep the loom clear of the seat belt and trim clips. Refit the interior panel and make sure the wiring is not trapped.
Controller and loom in the jack compartment after the trim is refitted
OPTIONAL
Route the remote-control cable
If you use the optional remote control, plan a route to the dashboard before closing the trim. The original long-wheelbase example followed the roof and A-pillar and needed about 8 metres or more, depending on the dash position. Follow the Volkswagen trim and airbag routing instructions and keep the cable clear of the curtain airbag deployment path.
Optional remote cable route along the roof trim in the original van
AFTER INSTALLATION
Connect with the app
Once the controller is connected and the trim is back in place, switch on the ignition. Open Bluetooth Devices in the Haldex Controller app and select your controller to connect.